Replacing the Heating Element Block
Preparation for Replacing the Heating Element Block
– Turn off the boiler’s power supply.
– Drain the water from the boiler before starting the work to replace the heating element block.
-
Step-by-Step Guide to Replacing the Heating Element Block
- Carefully remove the front panel of the boiler, avoiding any cable disconnection.
- Disconnect the display cable and grounding cable from the front panel.
- Open the lower part of the boiler casing to access the heating element block.
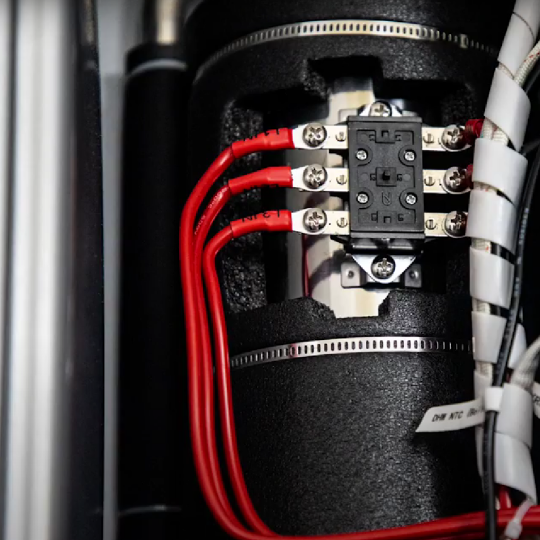
- If necessary, label the power wires connected to each of the heating element contacts to ensure correct reinstallation.
- Disconnect the wires and jumpers from the heating element contacts.
- Unscrew the flange mounting bolts. Be prepared for remaining water to drain from the heating element casing after unscrewing.
- Carefully remove the heating element by lowering it down, avoiding damage to the gasket.
-
Inspection and Installation of the New Heating Element Block
- Inspect the inner part of the boiler bulb for defects. If no defects are found, proceed with installing the new heating element.
- Place the gasket on the new heating element block.
- Install the new heating element by performing all operations in reverse order. Ensure that all safety precautions are observed during reinstallation.
- Fill the boiler with the heat carrier and bleed the air using service parameter P1.
Instructions that will be useful to you
Previous
The next